Thursday 30 December 2010

Rigging - What i can take forward...

I took on rigging as i am to be head of rigging within our team. Its something i decided i would be better at then most other creative areas within animation.

I needed to develop my skills for rigging three characters that are to be in our film. The bird, the marmot and the mongol. They are all quite different quirky characters and they all will have very different rigs to make.

A bird rig, quite challenging as i haven't done different rigs then the two legged two armed characters.

The mongol and the marmot both needed to run and jump and be as flexible as possible. If I am able to paint the weights right on these two characters then, I think we can get good animation from them.

Rigging- What i Have learnt

Before i started this unit, I had a very basic understanding of rigging, and when I started to learn more of rigging, I decided i quite enjoyed doing it. I didn't really have a good understanding or painting weights on a character, but now i believe have a better knowledge of doing it, and feel i can do it well.

I still need to use tutorials in places where I get things wrong, but I think that in time I will be better with more practice. I think this unit has allowed me to gain a better knowledge and understanding of rigging and I would like to believe I could go into this profession when i leave uni.

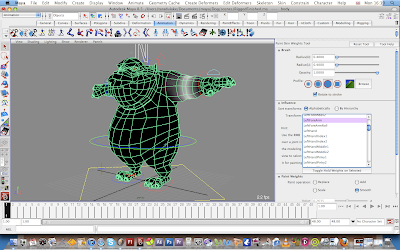
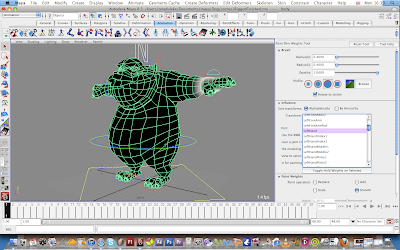
I can now rig to a closer professional standard a Biped character:

Things to work on in future: Blend shapes and Four-Legged characters.

Painting weights in Maya 2011 - The new tool - 01

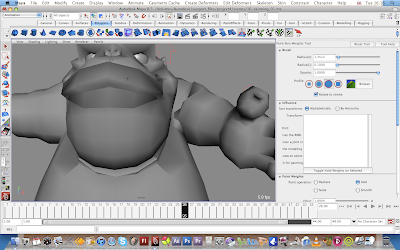
Here i have been playing with the new paint weights tool in maya2010.
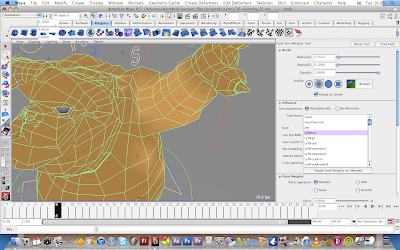
I have been getting used to using the handles to change theinfluence on the vertices. Thered colouris high influence, where thr blue is low influence. It seems pretty easy so far.... I then use the paint weights tool to tidy everythingup slightly howi learnt in maya08. thishas given me a very good result.
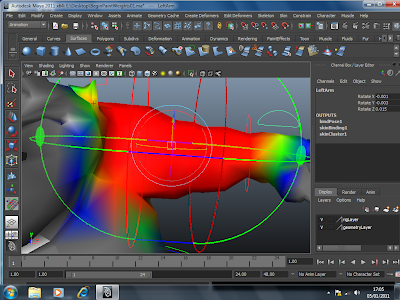


Rigging_ Painting the Weights - Influence


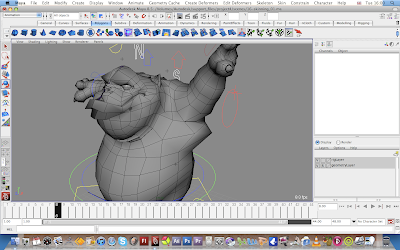
This is a Mixture of images for what the influence looks like on the character once i have painted the weights on the character.

It then helped to mirror the painted weights so it all looked and worked the same....


Timing for Rigging

Since the Beginning of term i have found that i was very slow with rigging a character as i wasn't sure of what i was doing. So one character rig took me aprox 6 full days to complete.
I had some major difficulties with painting the weights on the character as its a long and boring process.
I found when i learnt the painting weights on maya 2010 that the process is a lot quicker and now i believe i can rig a character properly in roughly four days.
I feel i have progressed a long way from when i started the term and when i move on to rigging the characters for real this term coming, i think I feel confident enough to get a good rig going for our characters.

Each week i have tried to learn a different skill within rigging.

I concentrated on:

Painting weights maya 2008
Painting weights maya 2010
Naming of joints and placing of joints
Joint orientation
Ik handles - With IK spline, Ising Sticky and Non-sticky

Rigging by myself problem two - IK handles

Here i have done a couple of tests to get a feel for the different settings for IK handles, as i found i had a couple of problems with using IK sticky earlier on in the Term.


Here i was testing the difference between and IK handle with sticky and onewithout sticky.

Left in video is without and Right is with sticky.

As you can see the Right holds better to the floor when the "leg" is straight, where as the Left without sticky doesn't.


Rigging by myself Problem one -Joint Orientation
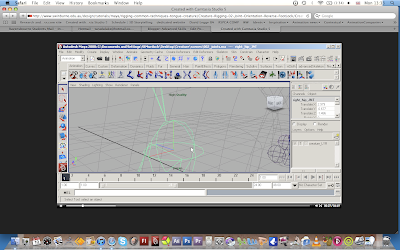


This week i concentrated on joint orientation and making sure that the joints were correct for rigging purposes. This was because i had some issues with orientating my joints, as i found they were not moving in the correct way....

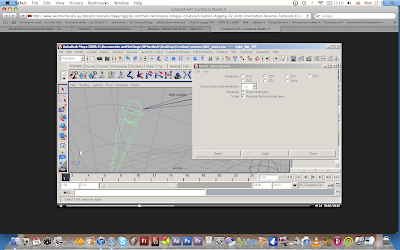
for this i looked at this tutorial, which is about rigging a tongue character. I found it very helpful.

Joint orientation.


Tutorial took from it was:

http://www.swinburne.edu.au/design/tutorials/maya/rigging-common-techniques-tongue-creature/Creature-Rigging-02-Joint-Orientation-Reverse-FootLock/Creature-Rigging-02-Joint-Orientation-Reverse-FootLock.htm

The Y axis should be going down the joint.
The Z axis is facing forward on the joints.

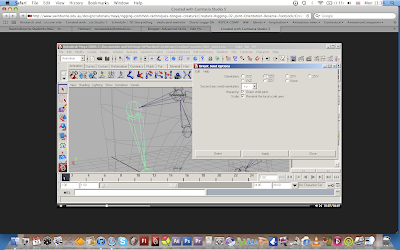
In the option box i need to use: +Y with the Orient child joints on and the reorientate localscale on as well.

This is done by selecting all the joints, but i don't necessarily need to re-orientate the root joint, an i can just leave that where it is.


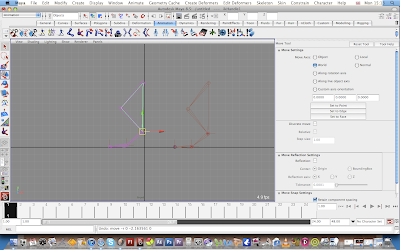
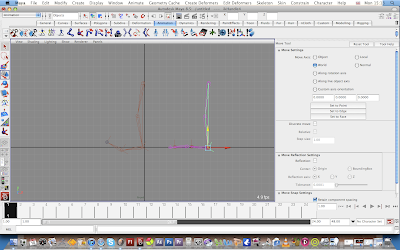
Here is a close image of the default settings given when maya creates a Joint.

Everything relates to the world axis, which is not what we want..... we want everything to relate to the joints or bones, So the Y axis needs to move down the joints.


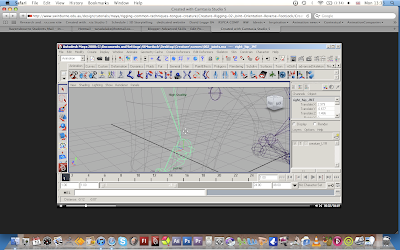
The third picture is from the tutorial. This is showing the option Box and the settings needed for my characters.


As we can see here the Y axis is going Down the joints.


This final image is what's needed for my joints to look like.

Begin Rigging by myself without Book Tutorial - 01

This was one of the problems i came across when i was rigging the dog by myself. The arm was not correct as the handle to move the shoulder was not parented with the IK handles properly. The left arm was also unable to rotate at the wrist. To resolve this i had to re-do the IK handle in order to make the wrist move as it should. The second video shows the rig how it should be...... The first shows the problems i was having.....

Wednesday 29 December 2010

Finished Rig.

Here is the finished rig for the dog monster. Everything seems to be working as it should.

turn sound off- suggestion :-)

Sunday 26 December 2010

The Tutorials- Books gone wrong

I have been going through the Book: An essential guide to maya Character rigging and found that within the book there are a few miss-prints. This means that when creating a rig, some of the parts didn't move correctly.

Some of the bits in the book's problems might have just been that it was designed for a PC and not a mac, which is why some of the actions weren't happening as they should.

I compared this book to the one of maya 2010, and i managed to sort out a few of the problems.

Thursday 23 December 2010

The Final Rig complete.. Compared with previous rig
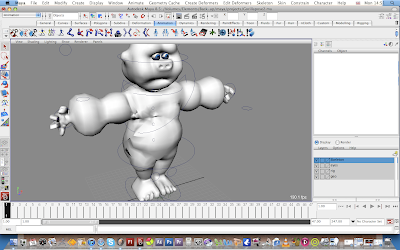
Here is a rig i did last year for a previous project.
It is of a Monkey,
There are a lot of problems with the rig as the painting of the weights is all wrong, so when they are animated the geometry clashes together and it doesn't look very professional. If the weights were painted properly then I think that I could get better animation out of the two characters.


As you can see in the Pictures that the geometry is all wrong with the painting of the weights.
The Geometry is all twisted on the lower picture.
Also the Handles do not sit right when they are on 0 as they should be.

Therefore, looking back on what i have a achieved now with the Dog monster rig, i have done a lot better then previously.

Wednesday 22 December 2010

Rigging-Joints
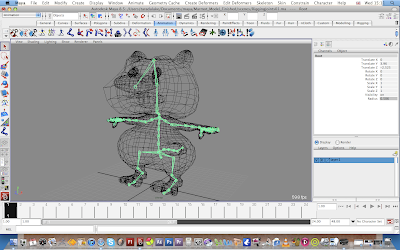
One thing i have learnt over the week is to name all my joints so that later on i can find them in the outliner to be able to join them up.

I also need all my joints named so that when it comes to painting weights i can pick out the joints needed to be influencing the geometry.

Various books have different names and methods for re-naming the joints.
I have decided to pick one similar to that of the Maya 2010 modeling and animation handbook. This is a book i know works well and i refer back too quite often when something went wrong within creating a rig by myself.


Here on the above two pictures is my practicing of placing joints within a character and making sure they are all connected in the correct way and all are named correctly so i can refer back to them later on.
All the joints are connected by the root joint which is good, as i didn't manage before to connect the joints correctly when i first did the skeleton for the Dog.


TUTORIAL

Below- Tutorial for placing joints_ http://www.freemayavideotutorials.com/maya-animation/character-animation/creating-joints-for-characters-1.html


http://www.freemayavideotutorials.com/maya-animation/character-animation/creating-joints-for-characters-2.html

Let’s start lesson,

  • Place your 3d character right on the origin of the grid
  • Keep the face of human character to the front. (It means when you look through the front camera your character should gaze at you. Character’s front should be in front of you, in front camera.
  • Go to side view
  • Change the camera to wireframe mode
  • character-setup-in-mayae004

  • Go to the layer editor and create a new layer
  • Name the layer, mesh
  • Select the object and add it to the mesh layer
  • character-setup-in-maya006

  • Click the empty square in layer editor right adjacent to the square V
  • Choose T for when you click in blue empty square
  • This will make your object a template, and object will become dim
    character-setup-in-maya008
    once again you need to create another new layer in layer editor for joints,
    let’s do it
    10. Create a New layer change its color and name it Joints
    character-setup-in-maya010
    11. Choose animation Menu Set and Go to the Skeleton Menu
    12. Get Join Tool with default settings
    character-setup-in-maya012
    13. Start creating joints from the hip of human model
    14. Create three joints for leg in side view as shown in image below,
    character-setup-in-mayae014
    If you see the Joint size is larger or smaller in accordance of
    the character, you should set the new Joint size from
    Follow the image below,
    character-setup-in-maya016
    15. Go to front view
    character-setup-in-maya018
    16. Get Move Tool and move the 3 leg joints to the right leg
    17. Get Rotate Tool and rotate 3 leg Joints and fit them in leg, see the image below,
    character-setup-in-maya020
    18. Go to the Skeleton Menu > Mirror Joints > options
    character-setup-in-maya022
    19. Reset settings and change the Mirror across to YZ
    character-setup-in-maya024
    20. Leave all other settings as it is and hit Mirror,
    character-setup-in-maya026


    Creating Joints for Characters (2)

    This free video tutorial will tell you how to create joints for 3d organic character. After this video tutorial you will be able to create joints for any organic character including human characters within Maya.

    character-setup-in-maya002

      21. Go to the side view and create a joints chain as back bone of the character, follow the image below,
      creating character joints
      22. Create one joint for jaw and make it a child of the neck joint, follow the image below,
      creating character joints
      23. Go to front view
      24. Create three joints’ chain for right arm
      creating character joints
      25. Go to the Top view
      creating character joints
      26. Adjust right arm’s joints on their proper place, follow the image below,
      creating character joints
      27. Mirror the right arm’s joints as you mirrored the right leg’s joints
      creating character joints
      28. Go to perspective view
      29. Examine all of the sides of the character and make sure that all joints are going to be fit very well, see the image below,
      creating character joints
      30.Go to the side view
      31. Get Joint Tool for creating joints chain for the foot
      (Note: We are not going to cover reverse foot in this lesson, because reverse foot is an advance level matter and we’ll discuss it in Projects Chapter of this website)
      32. Start creating foot’ joints right from the ankle’s joint
      (Note: you may need to make template of the joints’ layer in layer editor before starting foot’s joints from ankle)
      creating character joints
      33. Create 3 joints for foot, see the image below,
      creating character joints
      34. Go to the front view
      35. Move the foot joints into the right foot
      36. Rotate the foot joints to fit them into the foot
      37. Repeat the steps that you have done for mirroring the joints of leg and arms,
      38. Mirror the right foot joints to the left, see image below,
      creating character joints
      (Note: you have done almost all necessary joints, although there are a lot of joints left yet of hands fingers, feet fingers, ribs, reverse foot and etc but the joints which we have created in this lesson are sufficient for making a simple walk animation of human character. Now you need to parent all joints into the root joint and name them)
      39. Go to perspective view
      40. Open the Outliner from window > Outliner
      creating character joints
      41. Rename 1st joint to rLeg
      42. Rename the 4nd joint to lLeg
      43. Rename the backbone joints to root
      44. Likewise use the names rArm, lArm, rFoot, lFoot and so on for more joints in a body
      (Note: this is the time you need to parent all joints into the root, let’s do it)
      45. Select rLeg , lLeg and root joint (last selected should be root)
      46. Press the Key P on keyboard
      creating character joints
      47. Repeat the same action for the rest of the joints
      creating character joints
      (Note: This is the time; you need to un-template the mesh of the character)
      48. From layer editor un-template the character’s mesh
      creating character joints
      49. Select the root joint (this will automatically select all of the joints)
      50. Shift select the mesh of the character
      creating character joints
      51. Go to the Skin Menu
      52. Bind skin > Smooth Bind Skin (with default settings)
      creating character joints
      53. Go to Skeleton Menu
      54. Get IK Handle Tool
      55. Click on the rLeg Joint and then on the ankle joint (in actual joint No.1 and then joint No.3)
      creating character joints
      (Note: you have created an IK handle it means that you have created the muscle of the leg and by moving the ankle joint you can move the leg now)
      56. Repeat the same thing for left leg, arms and feet
      57. Create an Ik handle for backbone joints start from root and end on the chest joint.
      58. Create Ik Handles for neck and jaw as well
      59. Use Move Tool and move legs, arms, backbone, neck and jaw
      60. Enjoy the funny movements of the character and be ready to rig them and animate them in next lessons.
      creating character joints

    Congratulations:

      You are now ready to animate your 3d human character. Simply select ik handles and keyframe them. In next lesson we shall cover creating joints for fingers, ribs and then rigging them with readymade objects for better control. You should stay with me if you have reached here.

    Tuesday 21 December 2010

    Painting skin weights tool....

    For adding influence I have been using the Add option in the tool. If i know the influence is needed throughout i add to the value of 1.

    Some of the geometry is needed to be slightly influence by others so i use half the value of 1 or .3 to influence the verts in the right places.

    If influence needs taking off i use replace at the value of 0. - However using this adds other influences from other joints so it can make the geometry worst then needed.

    When i have all of the influence needed i smooth them over using the flood tool under smooth. If you work from the outside or more influenced down the joints i fid this can work best.

    Monday 20 December 2010

    Painting Skin Weights
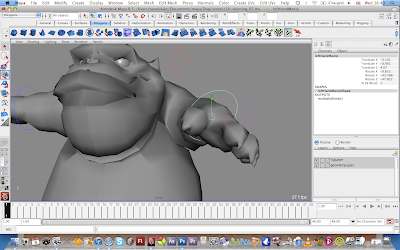


    Painting skin weights is probably where i will struggle with this.
    As he is quite a big character he has more geometry that needs to be painted by weights. Here i am trying to do the Left arm. I dont think im doing too badly. The book says to use replace, but some riggers say only use add. Im going to try both....


    Here you can see the geometry is acting up, this is because the vertices have different influences from different joints. So i need to remove all the wrong influences from the wrong joints.

    IK handles - Problem fixed

    TURN SOUND DOWN BEFORE PLAYING VIDEO_SORRY

    Here is a video of the problem I came across when I was Rigging the Leg. I found the leg didn't move in the correct way and to fix it I had to change the IK handle to have sticky on it.


    Sunday 19 December 2010

    Skinned dog - Before painting weights
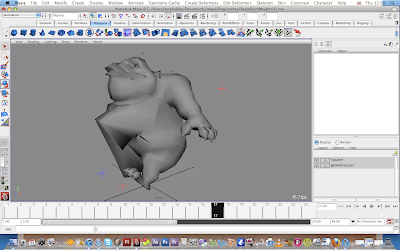
    Here i am identifying some of the key areas that need to be sorted in painting weights....

    After skinning my character i animated the main features such as the arms and legs and head. From this i can see a lot of deformation in the character. Above we can see that the stomach isn't moving correctly as its influences are in the wrong place.

    Above the leg is nearly there, however the stomach around it needs to be more rounded.
    The arms are making the back of the character the wrong shape, so if i paint weights to let the character relax and move better, it will look more realistic....

    Wednesday 8 December 2010

    Rigging the dog - 04


    Arms All set up...


    Spine- adding the IK spline solver..


    Allowing the Bones to bend how a back would adding clusters...

    Tuesday 7 December 2010

    Rigging for our animation- What we need

    Out Line...

    Both Characters will need to run and Jump and be as flexible as possible.

    I will need to make the characters IK stretchy so we can get a lot of exaggeration in the animation.

    The marmot needs to hold the Food whilst he is running.

    The eagles claws need to grip.
    The wings need to bend. I could use bend handles for this.

    They need to show expression in there faces. Blend shapes for the Mongol and marmot.

    Rigging tests


    Here is a Rig i am in the middle of doing at the moment, I have had a couple of problems where i have missed out vital steps, i also have been concentrating more on my other project, so hopefully ill get a lot more finished in the next couple of days.

    Thursday 2 December 2010

    Wing test-Bird

    Here i was testing a curve for the birds wings instead of rigging them normally, i thought we could get a good wing flap from using a curve instead.

    Wednesday 1 December 2010

    Maya2011 new rigging techniques- Research

    Here is a video to show rigging techniques in maya 2011, it could help when rigging my characters. There are new skinning methods in the new program. which will help with the deforming of some of the joints when binding the skin. I found this helpful, so long as i can get the program to work for me in 2011

    Bird rig- Research

    A bird rig is very different to a normal character rig that is standing up, as with any four legged creature. I have rigged butterflys to get the wings moving, but i thought it would be good to get bird rigs to show how i should operate my eagle.


    Here are a couple of riggs to look at to get an idea of the handles and rigg needed for our eagle.

    New 2010 Paint Weights tool- Research

    I have been doing some research into painting weights. Although i have not updated my mac to maya 2011 i have it on my home computer at home. I found out about the new tools from lecturer Dan and have gone on the internet to show me how the tool works. I think the tool could prove very useful when it comes to painting weights as using the regular method takes me a while to get right.

    This bottom video isfor painting weights normally in maya 2008. this is the version i have of maya. If i can see and watch people do it themselves, i find i can learn quicker then looking through some of the books which i can find hard to understand at points.

    Thursday 25 November 2010

    Hidden Keys-03
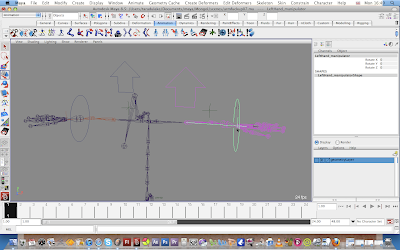
    I managed to Hide and lock the translate attributes to the left hand manipulator which meant that i couldn't move the hand as i would have liked, I found how to unhide and unlock the attribute, by going to general Editors,Channel control, Finding them in the list, then moving then back across to the left so i can select them and translate them. - At least i didn't have to re-rig the whole arm again which i was going to if i could find how to unlock them...


    The First image the arm cannot move as i have somehow managed to hide the keys.
    The second arm works fine....

    Monday 15 November 2010

    Rigging - Arms - 02

    I found that when i rotated the legs on the Character, one foot was acting differently from the other, i managed to fix this by creating the IK handles in the right foot again, as it turns out i did not have Sticky keys on when creating the solver.


    I now have a similar problem with the arms, so i am re-doing the left arm again as i believe the right arm was ok, and i cant quite pin point the part where i went wrong, but it could be down to the solver again.

    Im quite enjoying it at the moment, but i think its going to be the paint skin weights that will be the problem in the end.

    Friday 12 November 2010

    Rigging character- The set up -01

    Today i have started to create a skeleton for a character taken for auto-desk book - Intermediate 2010.

    what i have found difficult is getting the orientation of the joints correct, but after some playing around in component mode and setting the preferred angle for particular joints, i believe they are all moving how they should now.

    So long as i can remember the Y axis goes up for horizontal joints and the Z axis goes across for Vertical joints i should be able to keep my characters skeleton in the correct position for the joints to move correctly.


    I have just found out what gimbol lock is and found the reason why one of my rigs before wasn't bending in the right way.

    Tutorials and Books

    For this project i will now be learning and improving new skills in Rigging, such as Blend shapes, Facial rigging and the Paint weights tool.


    I have decided to get on and rig a character for practice so i can identify where i need to improve on in rigging, and then when i have fully rigged the character, try to animate it according to my project film.

    I have taken a model from the Book: Maya Autodesk Intermediate, and am using the book to go through and rig the character which is a dog. He is quite a big character, as i thought if i learned how to rig a bigger character it would get easier when i rigged a smaller or thinner character.

    I will then use this practice to rig one of my own models and hopefully get a better understanding of rigging different characters.

    Tutorials:
    I am looking at Books:

    • Auto-desk official training guide - intermediate - THe modeling and Animation handbook

    • Learning Autodesk Maya 2008 - Foundation

    • An Essential introduction to Maya Character rigging - Cheryl Cabrera

    • Body Language - Advanced character Rigging - Eric Allen and Kelly Murdock
    Online Tutorials - I am going to be using the escape tutorials

    I also will try to disect someone elses rigg in order to understand it better.

    I want to also look into blend shapes, for this i have a book called

    • Stop Starring, Facial Modeling and Animation done Right by Jaspa Osipa

    Wednesday 10 November 2010

    Specialism

    Im going to look more into rigging this term for dans project.
    The reason i am looking into rigging is because i have decided that it is the area in which i want to move forward into when i leave college. I am also head rigger for our BA group meaning that i have three characters to rig as well as possible rigging on other groups.
    When i have done rigging before i have quite enjoyed it, but i don't know a lot about it and if this is what i want to go into then i should look more into it for this project.

    I have a range of books that will help me to understand more complicated rigs and rigging methods.

    I want to look in to more complicated rigs so that we can get the best expression and body language from our characters in our film, so really allowing the rig to move properly, which means Painting weights correctly on a rig.

    Ill need to look into bird rigs, as we have a eagle in our film. How ever the bird rig doesn't need to be over complicated as he will only be in the film for a short time.
    The bird needs to flap his wings and claw his feet to grab the food.