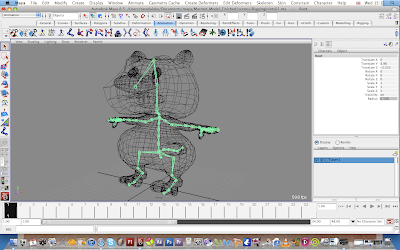
Here on the above two pictures is my practicing of placing joints within a character and making sure they are all connected in the correct way and all are named correctly so i can refer back to them later on.
TUTORIAL
Below- Tutorial for placing joints_ http://www.freemayavideotutorials.com/maya-animation/character-animation/creating-joints-for-characters-1.html
http://www.freemayavideotutorials.com/maya-animation/character-animation/creating-joints-for-characters-2.html
Let’s start lesson,
This will make your object a template, and object will become dim
once again you need to create another new layer in layer editor for joints,
let’s do it
10. Create a New layer change its color and name it Joints
11. Choose animation Menu Set and Go to the Skeleton Menu
12. Get Join Tool with default settings
13. Start creating joints from the hip of human model
14. Create three joints for leg in side view as shown in image below,
If you see the Joint size is larger or smaller in accordance of
the character, you should set the new Joint size from
Follow the image below,
15. Go to front view
16. Get Move Tool and move the 3 leg joints to the right leg
17. Get Rotate Tool and rotate 3 leg Joints and fit them in leg, see the image below,
18. Go to the Skeleton Menu > Mirror Joints > options
19. Reset settings and change the Mirror across to YZ
20. Leave all other settings as it is and hit Mirror,
Creating Joints for Characters (2)
Yad | Jun 29, 2010 | Comments 1
This free video tutorial will tell you how to create joints for 3d organic character. After this video tutorial you will be able to create joints for any organic character including human characters within Maya.
- 21. Go to the side view and create a joints chain as back bone of the character, follow the image below,
22. Create one joint for jaw and make it a child of the neck joint, follow the image below,
23. Go to front view
24. Create three joints’ chain for right arm
25. Go to the Top view
26. Adjust right arm’s joints on their proper place, follow the image below,
27. Mirror the right arm’s joints as you mirrored the right leg’s joints
28. Go to perspective view
29. Examine all of the sides of the character and make sure that all joints are going to be fit very well, see the image below,
30.Go to the side view
31. Get Joint Tool for creating joints chain for the foot
(Note: We are not going to cover reverse foot in this lesson, because reverse foot is an advance level matter and we’ll discuss it in Projects Chapter of this website)
32. Start creating foot’ joints right from the ankle’s joint
(Note: you may need to make template of the joints’ layer in layer editor before starting foot’s joints from ankle)
33. Create 3 joints for foot, see the image below,
34. Go to the front view
35. Move the foot joints into the right foot
36. Rotate the foot joints to fit them into the foot
37. Repeat the steps that you have done for mirroring the joints of leg and arms,
38. Mirror the right foot joints to the left, see image below,
(Note: you have done almost all necessary joints, although there are a lot of joints left yet of hands fingers, feet fingers, ribs, reverse foot and etc but the joints which we have created in this lesson are sufficient for making a simple walk animation of human character. Now you need to parent all joints into the root joint and name them)
39. Go to perspective view
40. Open the Outliner from window > Outliner
41. Rename 1st joint to rLeg
42. Rename the 4nd joint to lLeg
43. Rename the backbone joints to root
44. Likewise use the names rArm, lArm, rFoot, lFoot and so on for more joints in a body
(Note: this is the time you need to parent all joints into the root, let’s do it)
45. Select rLeg , lLeg and root joint (last selected should be root)
46. Press the Key P on keyboard
47. Repeat the same action for the rest of the joints
(Note: This is the time; you need to un-template the mesh of the character)
48. From layer editor un-template the character’s mesh
49. Select the root joint (this will automatically select all of the joints)
50. Shift select the mesh of the character
51. Go to the Skin Menu
52. Bind skin > Smooth Bind Skin (with default settings)
53. Go to Skeleton Menu
54. Get IK Handle Tool
55. Click on the rLeg Joint and then on the ankle joint (in actual joint No.1 and then joint No.3)
(Note: you have created an IK handle it means that you have created the muscle of the leg and by moving the ankle joint you can move the leg now)
56. Repeat the same thing for left leg, arms and feet
57. Create an Ik handle for backbone joints start from root and end on the chest joint.
58. Create Ik Handles for neck and jaw as well
59. Use Move Tool and move legs, arms, backbone, neck and jaw
60. Enjoy the funny movements of the character and be ready to rig them and animate them in next lessons.
Congratulations:
- You are now ready to animate your 3d human character. Simply select ik handles and keyframe them. In next lesson we shall cover creating joints for fingers, ribs and then rigging them with readymade objects for better control. You should stay with me if you have reached here.

No comments:
Post a Comment